DeepSeek Harness: First Use
Last updated: 2026-08-31
Using DeepSeek Harness for the first time is like sitting in a smart car for the first time — the dashboard looks complex, but once you know where the steering wheel and accelerator are, you can start driving. This lesson takes you from zero to your first conversation with the DSH Agent.
📋 Prerequisites: Completed 02-install.md, DSH Web UI successfully started
1. What You'll Learn
- Functions and layout of the Web UI's four main areas
- Workspace selection and purpose
- Complete flow of your first Agent conversation
- Agent tool execution process and visualization
- Approval popup mechanism and security policies
2. Web UI Interface Introduction
(1) Four Main Areas
The DSH Web UI consists of four core areas:
graph TB
    subgraph DSH Web UI
        A[Left: Session List]
        B[Center: Chat Area]
        C[Right: Tool Panel]
        D[Top: Control Bar<br/>Mode + Model + Settings]
    end
    D --> B
    A --> B
    B --> C
| Area | Position | Function |
|---|---|---|
| Session List | Left | Shows history sessions; supports creating, searching, deleting |
| Chat Area | Center | Main interaction area; send messages, view replies, tool execution results |
| Tool Panel | Right | Real-time display of tool call details, approval actions, execution logs |
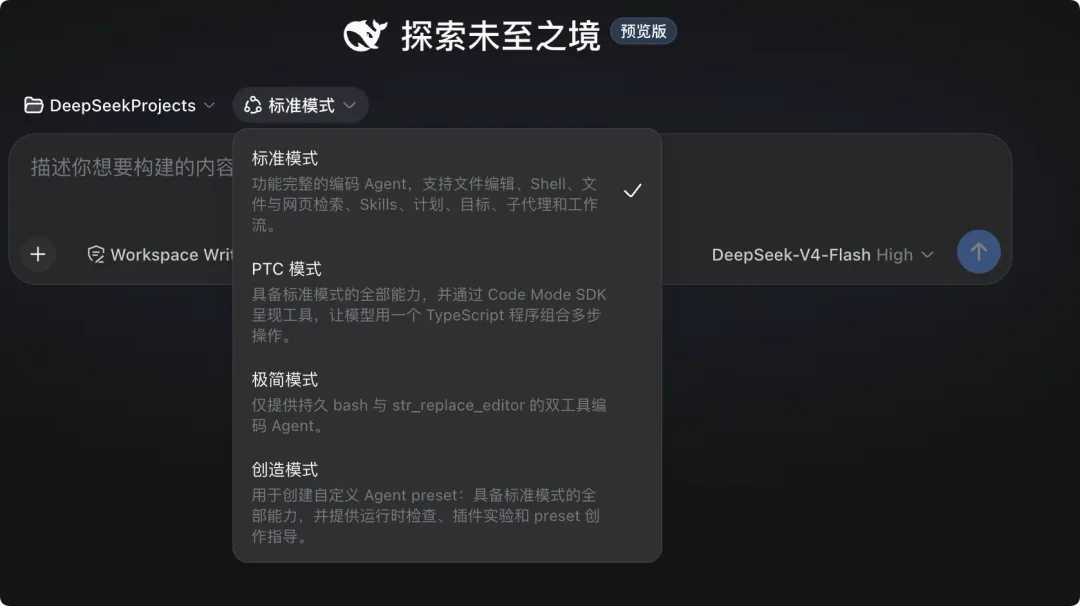
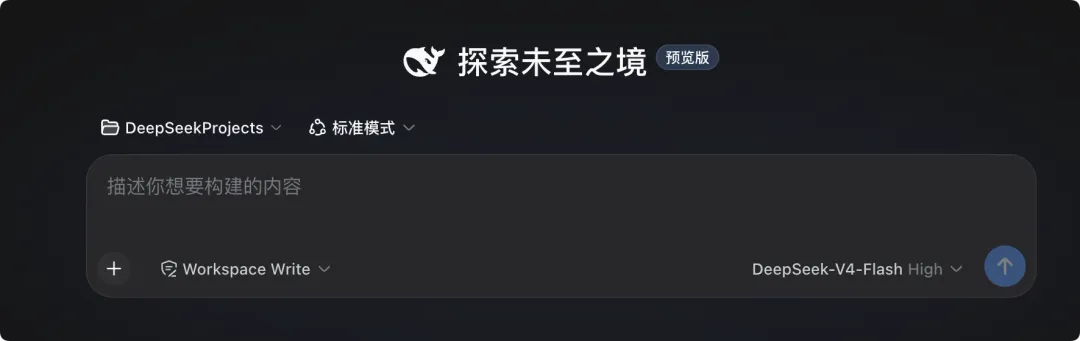
| Control Bar | Top | Mode switching, model selection, settings entry |
(2) Top Control Bar Details
The top control bar contains:
┌──────────────────────────────────────────────────┐
│ [Standard ▼]  [deepseek-chat ▼]  ⚙️  📋  ❓  │
└──────────────────────────────────────────────────┘
   ↑Mode Selection   ↑Model Selection   ↑Settings ↑Logs ↑Help
- Mode Selection: Standard / PTC / Minimal / Creative
- Model Selection: Current LLM model
- Settings: API Key, endpoints, sandbox policy, etc.
- Logs: View session logs (Trajectory view)
- Help: Keyboard shortcuts, documentation links
(3) Chat Area Details
The chat area is the core interaction zone. Each message may contain:
┌─────────────────────────────────────────┐
│ 👤 Alice                                │
│ Help me analyze the project structure   │
│ in the current directory                │
├─────────────────────────────────────────┤
│ 🤖 Agent                                │
│ 🔍 Using tool: search                   │
│   → Searching in /home/alice/project... │
│ ✅ Found 15 files                       │
│                                         │
│ This project is an Express.js app.      │
│ Main structure:                         │
│ - src/routes/ — Route definitions       │
│ - src/models/ — Data models             │
│ - src/middleware/ — Middleware           │
└─────────────────────────────────────────┘
3. Selecting a Workspace
(1) Purpose of the Workspace
The workspace is the root directory for Agent operations. All file operations and Shell commands are relative to it:
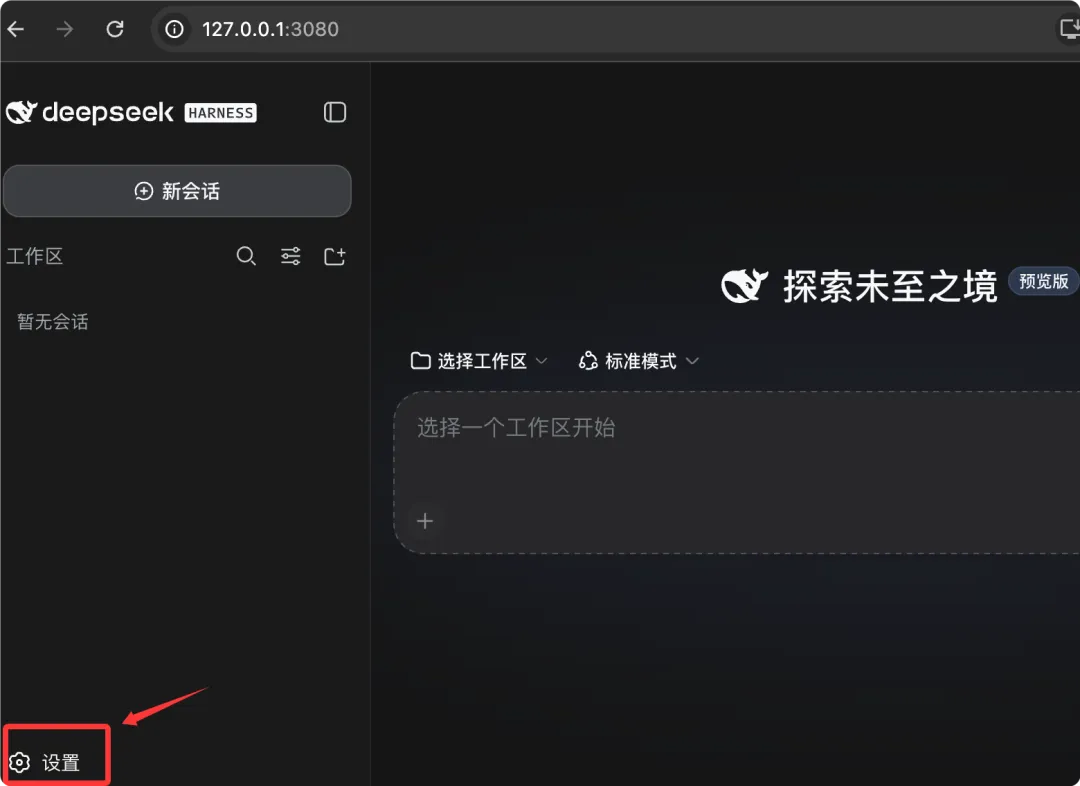
# The workspace determines the Agent's "field of view"
/home/alice/project     ← Agent can only see files in this directory
├── src/
├── package.json
└── README.md
(2) Selecting a Workspace
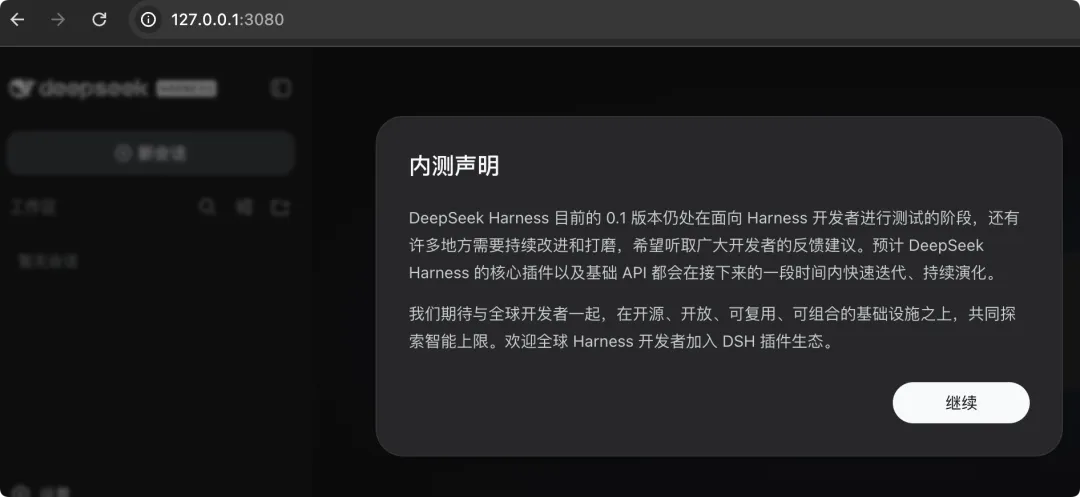
On first startup, DSH prompts you to select a workspace:
📂 Select Workspace
┌──────────────────────────────────────┐
│ ○ /home/alice/project               │
│ ○ /home/alice/another-repo          │
│ ● Enter custom path...              │
└──────────────────────────────────────┘
You can also switch at any time in settings:
# Pre-set workspace via environment variable
export DSH_WORKSPACE="/home/alice/my-project"

# Or in Web UI: Settings → Workspace → Change
(3) Workspace and Sandbox
The workspace works with the sandbox mechanism to limit the Agent's scope of operations:
graph TB
    W[Workspace /home/alice/project] -->|Allowed| A1[Read Files]
    W -->|Allowed| A2[Edit Files]
    W -->|Allowed| A3[Execute Commands]
    OUT[Outside Workspace /etc/passwd] -->|Denied| B1[Read]
    OUT -->|Denied| B2[Edit]
4. First Conversation
(1) Let the Agent Analyze a Repository
After workspace selection is complete, we send our first message:
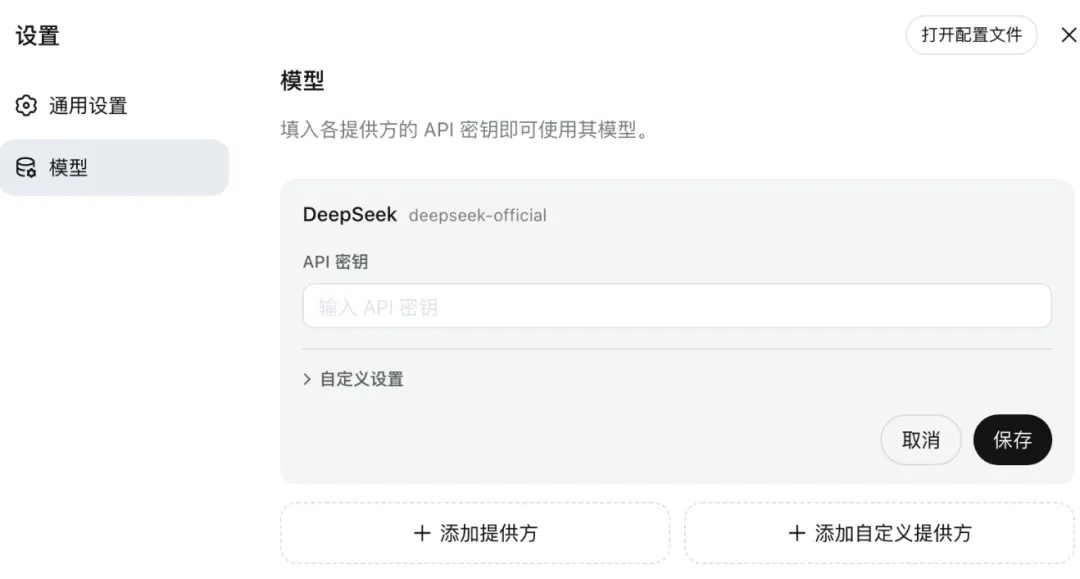
Hello, please help me analyze the code quality of this project
Agent's complete response process:
🤖 Agent: I'll help you analyze this project.

🔍 Using tool: search
  → Pattern: *
  → Path: /home/alice/project
  → Max depth: 3

🔍 Using tool: file_edit (read)
  → File: package.json
  → Action: read

📊 Analysis Results:

1. Tech Stack:
   - Runtime: Node.js 20.x
   - Framework: Express 4.18
   - Database: PostgreSQL (pg 8.12)
   - Testing: Jest 29.x

2. Directory Structure:
   src/
   ├── routes/    — 8 route files
   ├── models/    — 5 data models
   ├── middleware/ — 3 middleware
   └── utils/     — Utility functions

3. Suggestions:
   - Missing TypeScript type definitions
   - Recommend adding src/services/ layer to separate business logic
(2) Agent Tool Execution Process
Each tool call is displayed in real-time in the right-side tool panel:
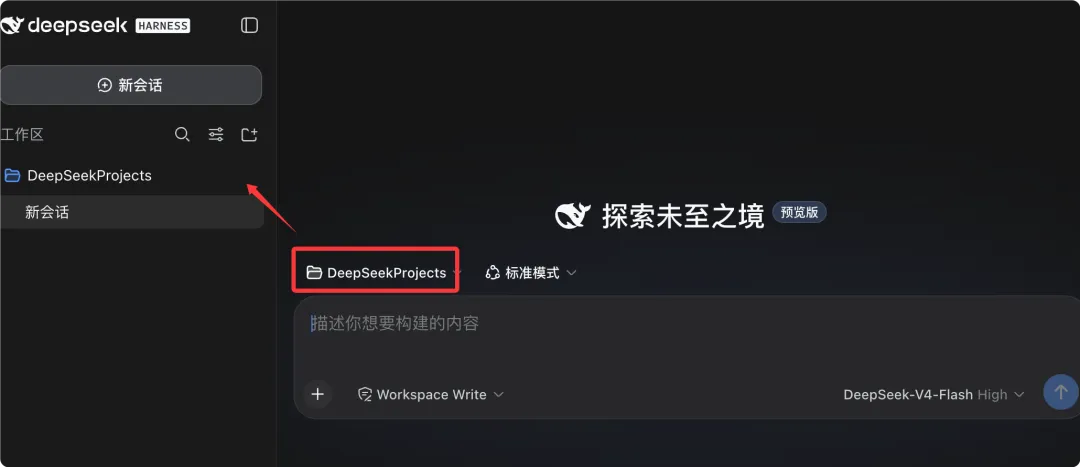
│                                      │
│ 🔍 search                            │
│ ├─ Status: ✅ Complete               │
│ ├─ Duration: 0.3s                    │
│ └─ Files found: 23                   │
│                                      │
│ 📄 file_edit (read)                  │
│ ├─ Status: ✅ Complete               │
│ ├─ Duration: 0.1s                    │
│ └─ File: package.json (1.2KB)        │
│                                      │
│ 📊 Total tools: 2                    │
│ 📊 Total time: 0.4s                  │
└──────────────────────────────────────┘

(3) Tool Execution Pipeline
Each tool call goes through three stages:
graph LR
    A[pre-execute<br/>Parameter Validation<br/>Permission Check] --> B[execute<br/>Actual Execution]
    B --> C[post-execute<br/>Result Processing<br/>Log Recording]
// Tool execution pipeline pseudocode
async function executeTool(tool, params) {
  // 1. pre-execute: validation + approval
  await preExecute(tool, params);

  // 2. execute: actual execution
  const result = await tool.execute(params);

  // 3. post-execute: log recording
  await postExecute(tool, params, result);

  return result;
}
5. Approval Popup Mechanism
(1) Why Approval Is Needed
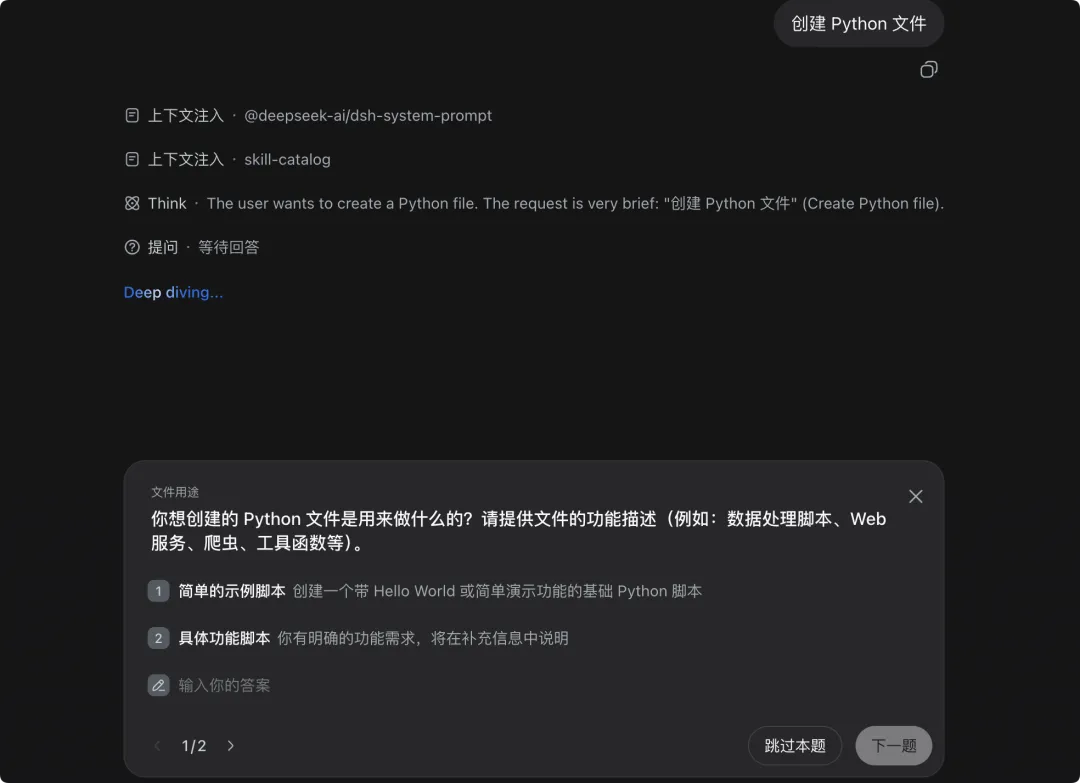
The Agent has powerful operational capabilities (editing files, executing commands), but improper operations can cause damage. The approval mechanism lets users confirm before the Agent executes dangerous operations.
(2) ▶ Example 2
When the Agent wants to edit a file, the Web UI shows an approval dialog:
┌─ ⚠️ Approval Required ───────────────────┐
│                                            │
│ Agent wants to:                            │
│ 📝 Edit file: src/index.ts                 │
│                                            │
│ Changes:                                   │
│ - Line 12: Add import statement            │
│ - Line 45: Modify error handler            │
│                                            │
│ ┌──────────┐ ┌──────────┐ ┌──────────┐    │
│ │  ✅ Allow │ │ 🔁 Always│ │  ❌ Deny │    │
│ └──────────┘ └──────────┘ └──────────┘    │
└────────────────────────────────────────────┘
Meaning of the three options:
| Option | Meaning | Use Case |
|---|---|---|
| Allow | Allow this time; still requires approval next time | One-time operation |
| Always | Always allow this type of operation; no more popups | Trusted operation types |
| Deny | Deny this operation | Unwanted operations |
(3) Approval Policy Configuration
You can preset approval policies in settings:
# dsh.config.yaml
approval:
  # File reads: always allow
  file_read: always

  # File edits: require approval
  file_edit: ask

  # Shell commands: based on danger level
  shell:
    safe_commands: always     # ls, cat, grep, etc.
    unsafe_commands: ask      # rm, chmod, sudo, etc.
    dangerous_commands: deny  # rm -rf /, dd, etc.

  # Search operations: always allow
  search: always
(4) Sandbox Mode and Approval Relationship
| Sandbox Mode | Approval Behavior | Risk Level |
|---|---|---|
| strict | All operations require approval | 🟢 Safe |
| permissive | Only dangerous operations require approval | 🟡 Moderate |
| off | No approval; Agent operates freely | 🔴 High risk |
# Set sandbox mode
export DSH_SANDBOX=strict    # Most secure
export DSH_SANDBOX=permissive # Default
export DSH_SANDBOX=off        # Not recommended
6. Hands-on: A Complete Agent Interaction
(1) Scenario Description
Alice wants the Agent to add a health check endpoint to her project.
(2) ▶ Example 2
👤 Alice: Create health.ts under src/routes/, add a /health GET endpoint
        that returns { status: "ok", timestamp: Date.now() }

🤖 Agent: I'll create the health check endpoint for you.

📝 Using tool: file_edit
  → Action: create
  → Path: src/routes/health.ts
  → Content:
    import { Router } from 'express';
    const router = Router();
    router.get('/health', (_req, res) => {
      res.json({ status: 'ok', timestamp: Date.now() });
    });
    export default router;

⚠️ Approval Required: Create file src/routes/health.ts
  → [Alice clicks Allow]

✅ File created: src/routes/health.ts

Now we need to register this route in app.ts:

📝 Using tool: file_edit
  → Action: edit
  → Path: src/app.ts
  → Changes:
    + import healthRouter from './routes/health';
    + app.use('/health', healthRouter);

⚠️ Approval Required: Edit file src/app.ts
  → [Alice clicks Allow]

✅ File edited: src/app.ts

Done! Health check endpoint added. Test it at GET /health.
(3) ▶ Example 3
┌─ Tool Panel ────────────────────────┐
│ 📝 file_edit (create)                │
│ ├─ Path: src/routes/health.ts        │
│ ├─ Status: ✅ Approved & Complete    │
│ └─ Duration: 0.2s                    │
│                                      │
│ 📝 file_edit (edit)                  │
│ ├─ Path: src/app.ts                  │
│ ├─ Changes: +2 lines                 │
│ ├─ Status: ✅ Approved & Complete    │
│ └─ Duration: 0.1s                    │
└──────────────────────────────────────┘
7. Session Management
(1) Creating a New Session
Left session list → Click + button → New session

Sessions are automatically named (based on first conversation content), or can be manually renamed.
(2) Switching Sessions
Click different sessions in the left session list to switch. Each session has independent:
- Conversation history
- Workspace settings
- Tool execution records
(3) Session Persistence
DSH session logs use an append-only mode:
// Each SessionEvent is automatically persisted
interface SessionEvent {
  type: 'user_message' | 'agent_message' | 'tool_call' | 'tool_result' | 'approval';
  timestamp: number;
  data: Record<string, unknown>;
}
After closing the browser, session data is not lost — simply reopen the Web UI to restore it.

❓ FAQ
always in settings, or switch to permissive sandbox mode. We don't recommend using off mode in non-isolated environments.📖 Summary
- The Web UI consists of four parts: session list, chat area, tool panel, and control bar
- The workspace determines the Agent's scope of operations; you must select one on first use
- The Agent performs actual operations through tools (search, file_edit, etc.), visualized in the tool panel
- The approval mechanism protects users from unintended operations: Allow / Always / Deny three-level choice
- Sandbox mode controls approval strictness: strict / permissive / off
- Sessions are automatically persisted; data is not lost when the browser is closed
📝 Exercises
1. ⭐ Basic: Start the DSH Web UI, select a workspace, and send the Agent "Help me view the project's package.json content." Record which tools the Agent used.
2. ⭐⭐ Intermediate: Have the Agent create a hello-dsh.txt file in the workspace with the content "Hello, DSH!". Observe the approval popup, try both Allow and Deny, and record the different subsequent behaviors.
3. ⭐⭐⭐ Challenge: Configure permissive sandbox mode and have the Agent simultaneously complete three operations: 1) Create a new file; 2) Edit an existing file; 3) Execute the Shell command ls -la. Record which operations triggered approval popups and which didn't, and analyze why.
